Golf cart steering should feel responsive and precise. However, over time, steering systems develop slack or play. This loose feeling makes your cart harder to control and less safe to drive. Fortunately, adjusting steering slack is a straightforward maintenance task most owners can handle themselves.
Understanding Steering Slack in Golf Carts
Steering slack refers to the amount of free play in your steering wheel. You can turn the wheel slightly without the front wheels responding. This delay between steering input and wheel movement creates a vague, imprecise driving experience.
All golf carts develop some steering slack eventually. Normal wear on components creates small amounts of play. Additionally, vibration from driving loosens connections over time. The key is addressing excessive slack before it becomes a safety issue.
Most experts recommend no more than one inch of free play at the steering wheel rim. Anything beyond this indicates adjustment or repair needs. Therefore, regular inspection helps catch problems early.
Common Causes of Steering Slack
Several factors contribute to loose steering in golf carts. The steering gear box naturally wears with use. Internal components develop clearance that translates to wheel play. This wear happens gradually over years of operation.
Tie rod ends wear out from constant movement and road impact. These ball joints allow steering motion while supporting vehicle weight. When they become loose, steering precision suffers significantly. Similarly, worn bushings throughout the steering linkage create cumulative slack.
Loose mounting bolts represent another common cause. Vibration gradually loosens fasteners that secure steering components. Even properly torqued bolts can work loose without thread locker. Furthermore, damaged or bent steering components from impacts create alignment issues and excess play.
Safety Considerations Before Starting
Park your golf cart on a level, stable surface before beginning work. Engage the parking brake and remove the key. This prevents accidental movement during adjustment procedures.
Wear safety glasses to protect your eyes from debris. Additionally, use gloves when working under the cart. Sharp edges and rusty components can cause injuries.
Never work under a cart supported only by a jack. Use jack stands or ramps for adequate support. According to Consumer Reports, proper vehicle support prevents serious accidents during maintenance.
Ensure adequate lighting in your work area. You need clear visibility of small components and adjustment points. A headlamp or portable work light makes the job easier.
Tools and Materials Needed
Gather all necessary tools before starting your adjustment. Basic hand tools handle most steering slack adjustments on golf carts.
You will need wrenches in common sizes, typically ranging from half inch to three quarters inch. Socket sets with extensions help reach tight spaces. Additionally, keep both standard and metric sizes available, depending on your cart model.
Other essential items include pliers, screwdrivers, a flashlight or work light, thread locker compound, and penetrating oil for stubborn fasteners. Some adjustments require specialized tools like a steering wheel puller or pickle fork for tie rod ends.
Having a helper makes certain steps easier. One person can hold components while another tightens fasteners. Therefore, consider asking someone to assist with your project.
Initial Steering System Inspection
Begin with a thorough visual inspection of the entire steering system. Look for obvious damage, bent components, or missing hardware. Check all visible bolts and nuts for tightness.
Examine tie rod ends for torn boots or excessive grease leakage. These signs indicate worn joints needing replacement rather than adjustment. Similarly, inspect the steering gear box for fluid leaks or damage.
Test for play at each connection point. Grab the tie rods near joints and try moving them by hand. Any noticeable movement suggests wear. This diagnostic step identifies which components need attention.
Rotate the steering wheel slowly while someone watches the front wheels. Note how much wheel rotation occurs before the tires begin moving. This measurement helps you evaluate improvement after adjustments.
Adjusting the Steering Gear Box
The steering gear box contains an adjustment screw that controls internal clearance. Locate this adjustment point, typically found on top or side of the gear box. Some models hide it under a cover plate or plug.
Clean dirt and debris around the adjustment area first. This prevents contamination from entering the gear box during adjustment. Then, loosen the lock nut securing the adjustment screw.
Turn the adjustment screw clockwise in small increments. Test the steering after each quarter turn. The goal is removing excess play without making steering too tight or binding.
Proper adjustment allows smooth steering without free play. However, overtightening creates steering that feels notchy or requires excessive effort. Find the balance between these extremes.
Once satisfied with the adjustment, hold the screw steady and tighten the lock nut. Recheck steering feel after tightening. Sometimes, securing the lock nut shifts the adjustment slightly.
Inspecting and Tightening Tie Rod Ends
Tie rod ends connect the steering gear to the front wheels. These components develop play from constant articulation and load bearing. Check them carefully during your adjustment process.
Grasp each tie rod end firmly and attempt to move it in all directions. Properly functioning ends should have no detectable play. Even small amounts of movement indicate wear requiring replacement.
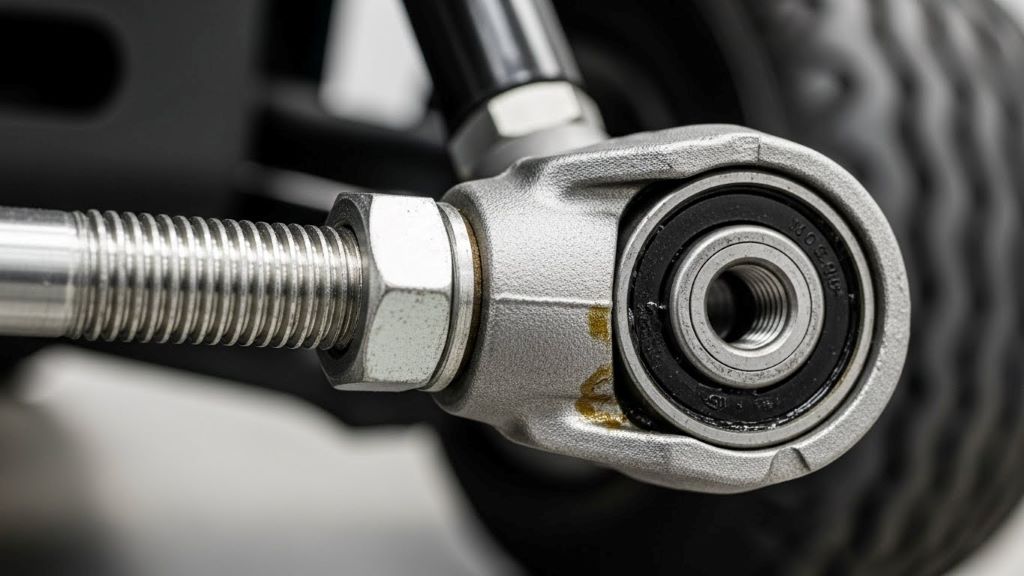
If the tie rod ends are tight but the jam nuts are loose, tightening may help. Use two wrenches to secure the jam nut against the tie rod. One wrench holds the tie rod while the other tightens the nut.
Apply thread locker to jam nuts after tightening. This compound prevents vibration from loosening the fasteners again. Nevertheless, worn tie rod ends need replacement regardless of how tight you make the jam nuts.
Checking Steering Column Connections
The steering column connects the wheel to the steering gear box. Multiple connection points exist along this assembly. Each represents a potential source of play.
Inspect the universal joint or coupling where the column meets the gear box. This joint allows angular movement while transmitting rotation. Worn universal joints create noticeable slack in the steering wheel.
Check mounting bolts securing the steering column to the dash or frame. These bolts can loosen over time from vibration. Tighten them to manufacturer specifications using proper torque values.
Examine the steering wheel attachment at the top of the column. The retaining nut must be tight to prevent play. Some carts use a splined connection that can wear and develop clearance.
Adjusting Steering Wheel Free Play
After addressing all mechanical adjustments, evaluate remaining free play at the wheel. Some clearance is normal and necessary for proper operation. However, excessive play indicates additional issues.
Measure free play at the wheel rim. Turn the wheel gently until you feel resistance and the tires begin moving. The distance traveled should not exceed one inch at the rim.
If free play remains excessive after all adjustments, worn components likely need replacement. Common culprits include the steering gear box, universal joints, or tie rod ends. Therefore, replacement becomes necessary rather than further adjustment attempts.
Document your measurements before and after adjustments. This record helps track steering system condition over time. Additionally, it provides baseline data for future maintenance.
Testing Your Adjustments
Drive your golf cart in a safe, open area after completing adjustments. Test steering response at various speeds. The cart should track straight without constant correction.
Make gentle turns in both directions. Steering should feel smooth and predictable. Furthermore, the wheel should return to center naturally after turns. According to Popular Mechanics, proper steering feel is essential for vehicle safety and control.
Listen for unusual noises during steering operations. Grinding, clicking, or popping sounds indicate problems requiring further attention. These noises often signal component wear beyond simple adjustment.
If steering feels too tight or binding occurs, you have overtightened adjustments. Return to the adjustment points and back off slightly. Proper adjustment balances responsiveness with smooth operation.
Maintenance Tips for Long-Term Steering Health
Regular lubrication extends steering component life significantly. Apply grease to fittings on tie rod ends and steering linkage. Most manufacturers recommend lubrication every six months or 50 hours of operation.
Inspect your steering system monthly for developing issues. Early detection prevents small problems from becoming major repairs. Look for loose bolts, damaged boots, or leaking seals.
Keep tire pressure at recommended levels. Incorrect pressure affects steering feel and accelerates component wear. Check pressures weekly if you use your cart frequently.
Avoid rough terrain when possible. Excessive impacts damage steering components and create alignment issues. Drive carefully over bumps and obstacles to minimize stress on the system.
Store your golf cart properly during extended periods of non-use. Support the front end to remove weight from steering components. This practice prevents flat spots on bushings and seals.
When to Seek Professional Help
Some steering issues exceed DIY repair capabilities. If adjustments fail to reduce slack adequately, internal component wear likely exists. Steering gear boxes sometimes need rebuild or replacement.
Bent or damaged steering components require professional assessment. These issues affect wheel alignment and handling. Therefore, qualified technicians should evaluate and repair structural damage.
If you lack confidence in your mechanical abilities, professional service provides peace of mind. Steering systems directly impact safety. Proper repair ensures reliable operation and protects occupants.
Complex adjustments or specialized procedures may require factory-specific knowledge. Consult your cart manufacturer’s service center for model-specific issues. They possess technical expertise and proper diagnostic equipment.
Cost Considerations
DIY steering slack adjustment costs very little beyond your time. Basic tools handle most procedures if you already own them. Thread locker and lubricants represent minimal expenses.
Professional adjustment services typically cost between 50 and 150 dollars. This price includes inspection, adjustment, and road testing. However, rates vary by location and service provider.
Component replacement increases costs significantly. Tie rod ends range from 20 to 60 dollars each. Steering gear boxes cost 150 to 400 dollars depending on cart model. Labor adds to these parts costs if you choose professional installation.
Preventive maintenance proves far less expensive than emergency repairs. Regular adjustments and inspections catch problems early. Consequently, you avoid costly component failures and potential accidents.
Conclusion
Adjusting steering slack in your golf cart improves handling and enhances safety. By following this systematic approach, you can eliminate excessive play and restore precise steering response. Regular inspection and maintenance prevent slack from developing into serious problems. Whether you tackle adjustments yourself or seek professional help, addressing steering issues promptly protects your investment and ensures enjoyable, safe driving. Remember to test thoroughly after making changes and document your work for future reference.
Frequently Asked Questions
How much steering slack is normal in a golf cart?
Normal steering slack should not exceed one inch of free play measured at the steering wheel rim. Anything beyond this indicates adjustment or component replacement is needed. Test by gently rotating the wheel until the front tires begin moving.
Can I adjust steering slack without special tools?
Yes, most steering slack adjustments require only basic hand tools like wrenches and sockets. However, some procedures benefit from specialized tools like steering wheel pullers. Additionally, you may need thread locker compound and penetrating oil for the best results.
How often should I check my golf cart steering for slack?
Inspect your steering system monthly if you use your cart regularly. Look for loose components, excessive play, and unusual noises. Professional mechanics recommend a thorough steering inspection every six months or 50 hours of operation.
What causes sudden steering slack in golf carts?
Sudden steering slack typically results from a loosened adjustment nut, broken component, or failed bushing. Impact damage from hitting obstacles can also create immediate slack. Inspect the entire steering system to identify the specific cause before attempting repairs.
Should I replace tie rod ends or adjust them?
Worn tie rod ends require replacement rather than adjustment. If the ball joint itself has play, no adjustment will help. However, you can tighten jam nuts if the tie rod end is solid but the locking nut has loosened.
Related Topics:
Revolutionizing the Fairway: What’s New in the PGA Tour 2025 Season?